
SHOWS AND COMPETITIONS
The Poodle Show Topknot: Banding, Spraying & Finishing
Setting Up for Success
In this video we illustrate the little things, that if completed correctly from the beginning, will make it easier for you to groom your poodle. I often see people banding their poodle starting with chasing their dog around the grooming table. They have a rubber band in one hand and a brush in the other hand. Then they wonder why their topknot doesn't turn out. In my opinion, this is like trying to ice a cake in a moving vehicle.
Teach your poodle the basics and your end result will be so much better. Both you and your poodle will be happier as things will happen in a faster manner.
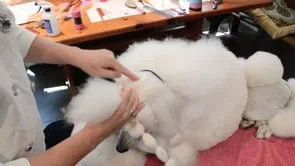
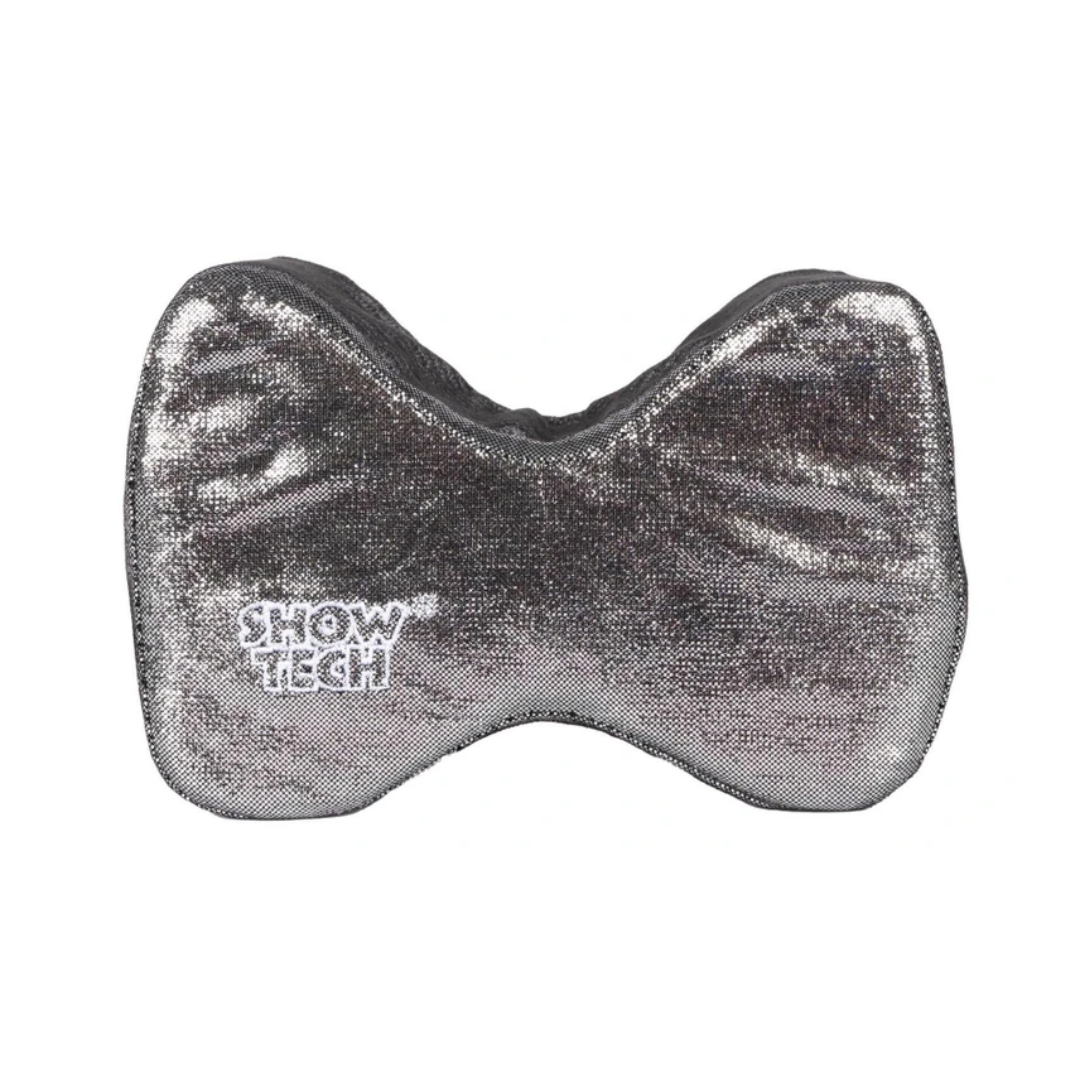
DO NOT just plunk your poodle down on a grooming table. They typically have a rough non slip surface. They are great to stand on but not too great to lie on (especially for up to an hour or more.) I always put down a towel, a thin dog bed, and I teach my dog to lie down straight (a crooked dog will result in a crooked topknot or or crooked maintenance bands). I use a bolster or neck roll so my poodle has a comfy area to rest its head. Also, this is a signal to your dog that it is time to be good and be still. Often we have no one to help us with our topknots and if our poodle is co-operative it gives you better results.
3 Ways to Put on a Collar
Make it a habit now to put your poodle's collar on BEFORE you begin to put the show bands in. It will always be the prettiest, most gorgeous spray up you have ever done, when you have somehow forgotten to put the collar in. The whole thing gets destroyed as you attempt to put the collar on over the tower of hair-sprayed hair.
#1 - Of course, the easiest way for you to put the collar on is to simply put it in the “part” that you made the day before when you banded or wrapped your poodle. Make sure to part the hair carefully at the back of the ears and simply lay the collar in there, before taking out the wrappers and brushing out the topknot.
#2 - When your poodle is already brushed out, follow these steps to put the collar on. First, put the collar on your arm so that you can easily get it over all that hair, while still using that hand to help hold the hair out of the way. With the collar on your arm and the dog brushed out, part the hair with a parting comb from the back corner of the ear to the back corner of the other ear, straight across the neck. Make sure the part is neat and to the skin. Slip the collar on from your arm, over the head and into the part. Brush the hair so you can no longer see the collar.
#3 - The last method is to band the collar in. This is most useful with thinner or shorter coated dogs, especially puppies, where the collar tends to slip down the neck and ruin the spray up. Once the collar is in the correct spot along the “part” (following method #1 or #2) and BEFORE you brush the hair over the collar, using a small rubber band, take a very small amount of hair from either side of the collar on the far right side of the neck (the off-show side) and band them together. Band the hair together close to the collar so that it will actually hold the collar in place, but not so tight that the collar cannot move around the neck. Be sure to cut this band out before removing the collar.
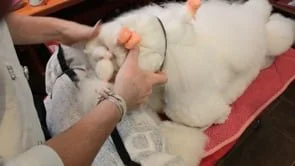
Show banding your puppy
Ensure the ears are out of the way and collar is in.
Measure for the bubble by making a pretend bubble
Make sure that the hair is not being held back too tightly as this moves the part lines and can ruin your topknot.
Part the hair where you had it pinched, straight across the skull.
With puppies, no matter what the variety, I like to use TWO bands at the same time. This helps hold all those little hairs puppies often have in the bubble.
Wrap the band tightly around the hair and pull the bubble, using one of the two methods described in "Pulling the Bubble".
Do not add bands in straight “sections” to the front corner of the ear. This generally gives your puppy a stark look, as there is often not enough hair grown for banding and a fan.
I like to use a "cheater band". Simply make a “part” one section back. Take a small amount of hair from each side of the “section” (left and right sides) and secure the two little “sections” into the “part” behind the loose hair, which would normally be in the band of the first section. This gives you the volume of the hair you desire while still keeping the sides of the cheeks clean looking.
You can use two cheater bands if you think appropriate. Do what works for you.
Be sure to cover puppy’s eyes when spraying up.
Not enough hair for a bubble?
Showing a Puppy Without a Bubble
If your poodle puppy's hair is so short that by having a bubble, you are actually detracting from it's expression, then DO NOT put a bubble in it.
It is completely okay to not “bubble” a puppy with short hair, especially if that puppy is younger than 9 months. If so, add a cheater band.
To make a cheater band, make a “part” one section back. Take a small amount of hair from each side of the “section” and secure the two little “sections” in the “part” behind the loose hair, which would normally be in the “band” of the first section.
This gives you the volume of the hair you desire while still keeping the sides of the cheeks looking clean.
You can use two cheater bands if you think appropriate. Do what works for you.
Spray up the front of the puppy’s hair in a fan shape. Be sure to cover the puppy’s eyes when spraying up.
Spraying Up the Poodle Show Topknot
With the show bands in place, Alison Foley demonstrates how to build and shape the Poodle's topknot using hairspray, working through three stages: creating the front fan, spraying the neck hair from side to side, and bringing the sections together to achieve the finished show outline.
The technique relies on careful positioning, controlled application of hairspray and building volume gradually. Alison explains why the hair must be directed forward, how to avoid weighing down the topknot with too much product, and how to create the distinctive crest, with the highest point at the occiput.
The Three Stages
1. Creating the Front Fan
Alison begins at the front of the topknot, shaping the hair around the bubble and working backwards in small sections. Hairspray is initially applied at the base of the hair, no more than one-third of the way up the shaft. By leaving a little space between each layer rather than pressing the hair together, she builds the volume needed for the finished shape.
2. Spraying the Neck Hair
Working from one side of the Poodle to the other, Alison gradually lifts and directs the neck hair forward towards the occiput. She demonstrates how to build strength through overlapping layers of hairspray while maintaining the height and shape of the crest.
3. Bringing the Sections Together
The final stage brings the front fan back into the sprayed neck hair, creating a continuous topknot with the highest point at the occiput. Alison then checks the outline, refines the shape and tidies the transition between the sprayed hair and the scissored jacket.
A Few Things to Remember
Keep the Poodle positioned straight throughout the spray-up.
Protect the dog's eyes whenever applying hairspray.
Build the shape gradually, working from the base of the hair upwards.
Avoid brushing out the hairspray you've already applied.
Direct the hair forward to help establish the correct crest and outline.
Expect to make adjustments. Alison emphasises that achieving the desired shape takes practice and familiarity with the individual dog's coat.
Removing Hairspray & After-Show Coat Care
Once your Poodle has finished in the show ring, it's important to remove the hairspray carefully to protect the coat and prepare it for the next show day.
Alison Foley demonstrates two methods: using a conditioning spray and dryer to break down the hairspray, or washing it out using a bucket or wash pan. The most suitable method depends on the amount of hairspray used, the length and density of the coat, and whether your Poodle will be showing again the following day.
Method 1: Removing Hairspray with Spray & Dryer
This method can be useful for puppies, Poodles with shorter or less developed coats, or when only a small amount of hairspray has been applied. It's also an alternative when washing isn't possible.
Alison demonstrates how to use Plush Puppy OMG spray, a clean pin brush and a dryer to gradually break down the hairspray, working from the shorter hair at the back of the jacket towards the topknot.
Gentle brushing is essential. If the hair isn't releasing easily, washing may be the better option.
Method 2: Washing Out the Hairspray
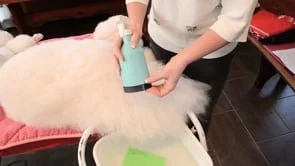
For Poodles with longer coats or more heavily sprayed topknots, Alison recommends washing the hairspray out.
Using diluted shampoo and a bucket or wash pan, she demonstrates how to work through the sprayed coat, rinse thoroughly and dry the hair before replacing the maintenance bands.
This method is particularly useful when preparing a Poodle to return to the show ring the following day.
A Few Things to Remember
Use a separate, clean brush for removing hairspray. Brushes used during spraying can accumulate sticky product that may damage the coat.
Be gentle when brushing out product, particularly through longer hair.
Avoid excessive heat when drying, especially when the coat is already dry.
Rinse shampoo thoroughly when using the washing method.
Make sure the coat is completely dry before replacing maintenance bands.
Keep the show collar in place until you're ready to reband the coat. Its position provides a useful parting guide for the next show day.
Breaking Down the Topknot: Leaving the Collar In
Alison shares a handy tip for preparing your Poodle for the next show day. By leaving the show collar in place while removing the hairspray and only taking it out when you're ready to reband, you preserve the parting line for easy collar placement the following day.